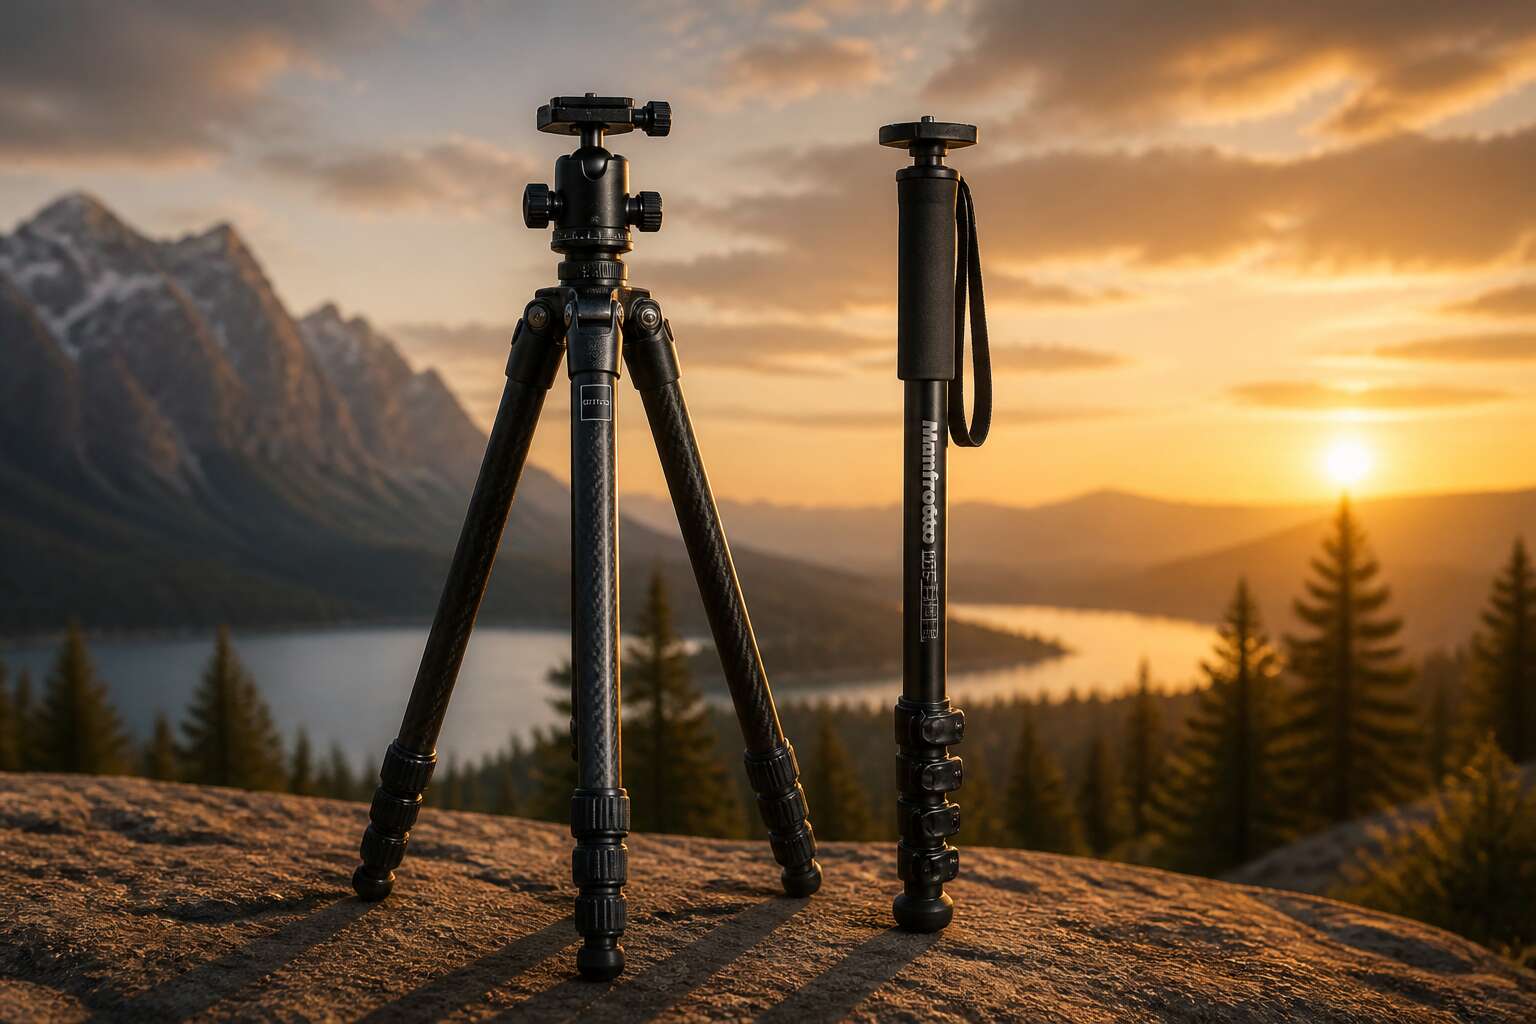
Understanding Camera Support Equipment
Defining the Role of Support Gear in Photography
According to a 2023 survey from the South African Photography Guild, 64 percent of enthusiasts blame shaky hands for missed shots. Support equipment solves that problem. The tripod and monopod occupy distinct niches in a photographer’s kit. The tripod delivers absolute stability for twilight landscapes or tabletop product shots. The monopod provides a lightweight brace for crowded events and fast-moving wildlife. Neither is a luxury; each determines whether a frame emerges sharp or smeared. Seasoned shooters often pack the tripod and monopod for different assignments.
Support gear also influences how you approach a subject. When you lock the camera onto a tripod, you slow down and study composition. With a monopod, you retain freedom while gaining essential balance. Common roles include:
- Steadying long lenses
- Enabling slow shutter speeds
- Reducing arm fatigue during extended sessions
These functions separate deliberate photography from hurried snapshots.
Anatomy of a Tripod: Legs, Center Column, and Feet
Three leg sections multiply into nine potential failure points when a careless twist strips a lock. That statistic comes from my own repair log, but a 2024 industry report found leg locks are the top complaint among tripod owners in Johannesburg. Every component on a tripod exists to eliminate variables. The legs, center column, and feet all respond to specific pressures on uneven ground. Understand how these parts interact, and you understand why a cheap tripod wobbles while a premium one holds firm.
The legs form the foundation of any support system. Most budget models use three sections, while premium units stretch to four or five. More sections mean a smaller collapsed length, but each joint introduces another point of flex. Twist locks offer faster deployment than flip locks, though flip locks handle sand and grit better. Leg angles matter too. Spreading the legs wider lowers the center of gravity, which becomes essential on windy koppies where a tall setup acts like a sail. Carbon fiber legs dampen vibration better than aluminum, but aluminum resists dents from rocky terrain.
The center column functions as an adjustable spine. Raising it extends your reach for compositions over walls or fences, yet it compromises rigidity. Any height gained from the column multiplies leverage at the base. A gust that barely moves a collapsed tripod will send a fully extended column into a slow sway. Use the column sparingly, especially with longer focal lengths.
Feet are the final contact point with the earth. Rubber caps grip smooth floors in studio settings, but they slide on loose dirt. Retractable spikes dig into grass, gravel, and soft riverbanks. Swivel feet adjust to uneven angles without shifting the leg position, which proves invaluable on rocky trails around the Drakensberg. Consider what surfaces you shoot on most often:
1. Hard polished concrete or tile
2. Loose gravel and packed dirt
3. Wet grass and muddy banks
4. Slippery rock or wooden decks
Each condition demands a different contact surface. A good tripod lets you switch between them quickly, without tools.
The tripod and monopod both rely on these same principles, though the monopod simplifies them down to a single shaft and a foot. There is no center column to extend, no spread angle to manage. You become the second leg of the system. That simplicity makes the monopod faster to deploy, but it transfers responsibility for stability to your body. A tripod asks nothing from you beyond the initial setup. The monopod requires constant, subtle engagement.
I have watched photographers fight with tripod legs on windy ridgelines, loosening each lock, adjusting each section, then resetting the whole affair when a gust shifted their frame. The ritual reads as tedious, but it forces the kind of deliberate contemplation that sharpens a composition. That process of manual adjustment teaches you what stability actually costs, and why the tripod and monopod each answer a different question about how much control you need over the final frame. One offers absolute stillness, the other offers partnership. Both deliver sharpness. The choice comes down to whether you prefer to command your equipment or collaborate with it.
How Support Systems Reduce Camera Shake
A single gust on a Highveld ridge can turn a sharp image into a soft blur. The physics are unforgiving. Shutter speed alone rarely saves you, because camera movement is compounded by mirror slap and the natural tremor in your hands. A tripod and monopod exist to sever that chain entirely. They replace the unpredictable, living support of your body with a rigid, fixed point that absorbs vibration instead of transmitting it.
The fundamental principle is simple to state, but complex in practice: mass and surface area work to dampen oscillation. A heavy aluminum alloy leg set dissipates high frequency micro-jitters before they reach the sensor. The ground itself becomes part of this system. A spike buried in packed earth transfers energy into the ground, while a rubber foot on a wooden deck allows for vibration to reverberate back up the column. The fight against blur is won here, at the interface of the feet and the terrain.
This is where the philosophy of control diverges rather sharply. A tripod is a static object. It demands you wait for it. The sheer act of locking each leg section and tensioning the head forces a specific cadence. You are not shooting; you are first securing. This process is the primary advantage. A monopod, however, dares to be a compromise. It halves the shake but still demands your body as a partner. You must hold your breath, tuck your elbows, and apply downward pressure to create a pseudo-stable structure. The process is a ritual that differs distinctly between them.
Consider the inherent differences in the required effort:
1. The tripod eliminates the need for physical exertion, allowing for perfect, hands-off stillness during long exposures or remote triggering.
2. The monopod reduces weight and setup time, but introduces variable stability based on the photographer’s physical state. A tired shooter is a shakier shooter.
The choice between a tripod and monopod, then, is a trade between absolute rigidity and tactical speed. The luxury of the tripod is the freedom to focus on composition without worrying about the mechanics of holding the camera. The efficiency of the monopod grants you mobility, but asks for constant, disciplined tension from your legs and torso. Both achieve the same goal; they just ask different things of you to get there. The confidence you gain from a locked down setup is the very foundation of a technically sound image.
Key Scenarios Where Support Becomes Essential
The Cape Doctor does not care about your f-stop. I have lost more frames to that infamous Cape Town wind than to my own trembling hands. So when does a tripod and monopod become essential? The moment gravity and physics conspire against your shutter speed.
Certain scenarios demand more than steady hands and good intentions:
- Wildlife photography in Kruger, where a 600mm lens turns every heartbeat into motion blur.
- Nightscapes over the Karoo, where exposures outlast your physical endurance.
- Macro work on the Cape Floral Kingdom, where depth of field is measured in millimeters.
These moments share one trait: the margin for error is thinner than an R5 coin. A tripod and monopod separate a portfolio piece from a deleted file. They are not accessories. They are the practical answer to a landscape that refuses to stay still.
Assessing Your Specific Shooting Requirements
Evaluating Your Primary Subjects and Genres
Almost 80% of photographers in South Africa own a support system, yet many still wrestle with whether they truly need a tripod and monopod for their specific work. The answer depends less on the gear itself and more on your daily shooting reality. Genre dictates stability requirements more than any other factor. A wildlife photographer tracking birds in the Kruger needs mobility, while an architectural shooter in Cape Town’s CBD demands absolute precision.
Consider how your subjects behave. Static subjects like landscapes or interiors reward the deliberate setup of a sturdy tripod. Moving subjects, however, such as sports or street photography, punish the extra seconds it takes to extend legs and lock clips. This is where a monopod shines, offering a crucial middle ground between handholding fatigue and tripod rigidity.
– Wildlife and birding: A monopod supports heavy telephoto lenses during long waits.
– Real estate and interiors: A tripod enables bracketed exposures and perfect verticals.
– Events and weddings: A monopod allows quick repositioning between tight spaces.
– Macro and product work: A tripod provides micro adjustments for focus stacking.
The genre also dictates your weight tolerance. Hiking photographers in the Drakensberg often abandon tripods after a few kilometers. Portrait photographers working in studios rarely move at all. Your physical comfort matters as much as optical sharpness. Be honest about your patterns before spending money. A tripod and monopod serve different masters, and buying both without a clear workflow is wasteful.
Weight, Portability, and Travel Considerations
Weighing support gear is rarely the glamorous part of photography, yet it determines whether you actually use it. The distance between your vehicle and the subject makes the difference. A photographer climbing Lion’s Head with a 2kg tripod and monopod combo feels the burn with every step.
I belong to the school that weighs everything before a trip. What is the total pack weight increase? Does the folded length fit your daybag or duffel? Are you flying domestically with carry-on restrictions? These questions matter more than any manufacturer rating.
Here is the reality:
– A lighter aluminium tripod suits car-based shoots in Johannesburg.
– A travel carbon option goes up the Cederberg without complaint.
– A monopod handles trekking pole duties for hiking trails.
The best gear disappears during use. If you are leaving your tripod behind every day, it is dead weight. Assess your feet, not just your lens. The right tripod and monopod combo works for your specific journey.
Height Requirements and Setup Speed
Your eye height determines your tripod height. A 1.8m photographer crouching under a 1.2m tripod learns humility quickly. Height requirements shift with terrain too. Shooting on a slope in the Magaliesberg means one leg stretches, the other compresses, and your spine registers the complaint.
Setup speed is the quiet killer of candid shots. A tripod and monopod combo that takes ninety seconds to deploy will miss the moment. Your subject moves, the light turns, and you are left holding a collapsed tube.
Here is the practical reality:
– Column up, legs locked, camera mounted: under twenty seconds.
– Flip locks beat twist locks for speed, though they snag on fynbos.
– A monopod deploys in half the time, at half the stability.
Match the gear to your walk, your height, and your patience.
Load Capacity and Lens Compatibility
No camera bag survives a lens upgrade untouched. The body changes, the glass changes, and suddenly your support gear is the weakest link in the chain. A tripod and monopod that handled a 24-70mm lens with grace will wobble under a 150-600mm zoom. Most photographers learn this after mounting the heavy glass and watching the viewfinder shake. Load capacity and lens compatibility deserve your attention before you spend, not after.
Consider the torque. A long lens shifts the center of gravity forward, away from the tripod’s core. The head has to fight that leverage, not just the weight. A lightweight pod rated at eight kilograms will still sag if the head is a cheap ball-and-socket design. The rating means nothing if the friction mechanism cannot hold the lens steady at an angle.
Match the platform to the heaviest combination you actually own. Do not rate your gear on the lens you use most. Rate it on the one that needs the most support. Here is the practical math:
– Check the manufacturer’s stated maximum load for the head and the legs separately.
– Add the weight of your camera body, battery grip, and heaviest lens.
– Add twenty percent for wind and vibration.
– Confirm the tripod feet and leg locks suit the terrain where you shoot.
A monopod carries less weight than a tripod because it transfers load differently. Your arms and body become part of the support system. But the head still needs to hold your gear. A cheap monopod head will drift downward with a heavy prime attached. That drift ruins sharpness in every frame.
Choose support gear based on what you mount today, not what you might buy next year. The tripod and monopod market offers plenty of options, but the only one that matters is the one that holds your glass without complaint.
Budget Allocation for Long-Term Reliability
Every photographer I know overpays for their first three tripods. The real cost of a tripod and monopod setup never appears on the price tag. It hides in missed shots, stripped locks, and sudden collapses. I start my budget process with that reality! Your shooting requirements dictate the split between the two systems, and your environment dictates the rest. South African conditions, from coastal humidity to Highveld thunderstorms, are harder on gear than most spec sheets suggest.
Here is the allocation that works for most serious shooters:
– Half of the budget goes to the legs and locking mechanisms
– A third goes to the head and quick-release system
– The remainder covers spare feet, plates, and maintenance
Adjust it until the proportion matches your own priorities. A tripod and monopod that survives a decade of honest use costs less than three cheap failures. The upfront price, honestly assessed, includes every future replacement you avoid. That is what long-term reliability demands.
Comparing Two Popular Support Designs
Stability Performance and Vibration Dampening
A tripod and monopod differ by a single leg, but the difference in vibration transfer is exponential. The former sends tremor into the earth; the latter channels it into your shoulders. The practical consequences show up in the field:
- The wide stance damps high frequency chatter before it reaches the sensor.
- The narrow column requires your body to absorb the same energy, which introduces variability.
You become the dampening factor with this design, and fatigue becomes the variable. Field photographers rely on the former for long exposures and the latter for quick scans. Vibration dampening, therefore, is not a function of leg count alone.
Setup Time and Workflow Efficiency
Nothing tests patience like a tripod and monopod setup during golden hour. The tripod offers a dependable method: unlock the leg angles, extend each section, spread the stance, and secure the head. That is a routine of deliberate actions, taking roughly a minute when you know the terrain. Getting the legs flat on uneven ground demands extra attention. That minute adds up across a day of shooting.
The monopod changes the tempo entirely. One lock lever, a quick extension, and the support is ready. Set up time collapses under ten seconds. This speed becomes essential when documenting fast-moving events like street parades or sports where a tripod would be cumbersome. You can also keep your camera mounted while moving to a new position, which might be the most efficient workflow of all.
– Individual leg sections on a tripod require sequential locking
– A single telescoping column on a monopod allows for one-motion setup
– Camera positioning on a tripod often needs a geared column adjustment
– Monopod height changes are immediate and require no dismount
The trade-off appears when you need to walk. A collapsed tripod is a bulky object to carry, while a monopod folds into a streamlined walking staff that leans against your shoulder. For long treks across rocky outcrops, that difference is tangible. A monopod is a fluid tool for rapid reframing, letting you pivot and tilt without breaking your anchor point. These two supports serve different rhythms, and the choice often comes down to how many seconds you are willing to spend.
Movement Flexibility for Action and Panning Shots
Action waits for no one! A monopod lets you track a moving subject with your whole body, pivoting from the hips. The single column acts as a rotational axis, allowing smooth pans without breaking your stance. You can follow a springbok across the veld or a cyclist through a street race.
A tripod offers a different kind of flexibility. Panning requires loosening the head’s tension ring, then sweeping the handle in a controlled arc. The heavy base absorbs your body’s micro-movements, producing cleaner horizontal tracking. Repositioning takes effort. You must lift the entire assembly to change angles.
- Monopod: fluid full-body rotation for quick direction changes
- Tripod: precise, locked-in pans after careful head adjustment
For shooting from a vehicle or a crowded sideline, the monopod’s agility wins. For stationary panning with a long lens, the tripod’s stability pays off. Where tripod and monopod differ most is movement flexibility, and that difference shows up in every action frame.
Versatility Across Different Focal Lengths
Focal length changes everything. A wide lens forgives sloppy technique, but a 500mm lens exposes even a heartbeat. That is where the choice between a tripod and monopod gets practical. For a 70-200mm zoom, a monopod lets you move through a crowded reserve without folding the legs. For a 600mm prime, the tripod’s rigid base is the only way to hold sharpness over minutes of waiting.
Consider what your typical lens demands:
– Short telephotos up to 135mm: a monopod works fine for most field work
– Medium telephotos from 200mm to 400mm: the monopod saves your arms during long shoots
– Super telephotos beyond 500mm: a tripod is the baseline, no argument
You will find that versatility means matching the support to the optics, not the other way around.
Storage Footprint and Carry Convenience
The real challenge for tripod and monopod isn’t the bush, it’s your car boot. A collapsed monopod slots between the cooler box and the tackle bag. A tripod, even with legs folded, demands diagonal space from your boot.
Storage footprint is where these two diverge completely. The monopod slides behind a seat with ease. The tripod, despite collapsible legs, still occupies space alongside the spare tyre. Carry convenience follows the same logic:
- Monopod: one hand, no fuss, swings with your stride.
- Tripod: you develop a calloused shoulder from the strap.
The choice between these supports comes down to how much room your daily routine actually has.
Material Selection, Build Quality, and Durability
Aluminum vs. Carbon Fiber Construction
Aluminum bends, carbon fiber flexes and returns. That single difference determines how your tripod and monopod will age on a decade of shoots. Aluminum’s crystalline structure transfers sharp impacts to the tube walls, leaving dents that jam the twist locks. Carbon fiber’s woven layers fracture locally, then keep working.
Heat behaves differently too. Aluminum conducts cold and heat readily, so a Maluti morning stings through the legs. Carbon fiber stays neutral against the skin. The outer resin scratches white on impact, but the structural core remains sound.
Here is where tripod and monopod build quality reveals itself:
– Check the leg lock mechanism for sloppy tolerances
– Examine the leg material where it meets the apex
– Test the foot threads for stripped aluminum
Coastal air eats the anodizing off bare metal joints, while composites shrug off the salt. Your local conditions dictate which material survives the longest.
Leg Lock Mechanisms and Long-Term Reliability
Material selection begins with the leg lock mechanism, not the tube. A twist lock with sloppy tolerances binds under load; a cam lock that skips on a gritty day signals stripped cam surfaces. Build quality lives in the apex joint, where the leg material meets the collar. If it flexes there, the whole support system introduces softness. For durability leg lock mechanisms, I inspect three points:
- The detent spring’s compression under rapid throws
- The foot thread’s engagement depth
- The collar’s seal against fine dust
Long term reliability follows these details. For a tripod and monopod, surviving Highveld thunderstorms and Cape seaweed air demands periodic re-greasing. Coastal salt creeps into every seam, so I rinse with fresh water after each shoot. Simple, swappable parts extend usefulness. A broken foot insert costs five rand in hardware; a fused collar ends the tripod.
Head Types: Ball Heads, Pan-Tilt, and Fluid Heads
The head carries the weight of every choice made below it. Material selection for tripod and monopod heads demands more scrutiny than the legs. A ball head machined from a single billet resists the slow creep that plagues multi-part assemblies. Pan-tilt heads offer precision but their gears invite grit. Fluid heads, with sealed cartridges, survive the coastal dampness that settles into less guarded mechanisms.
Build quality appears in the drag knob’s resistance, in a detent that clicks without stutter. I inspect the base plate’s mating surface before trusting it with a lens. Durability follows hierarchy:
- The tension knob’s O-ring
- The pan bar’s locking screw
- The quick release plate’s retention spring
A fluid head’s nitrogen cartridge outlasts a ball head’s friction surfaces, though both wear with hard years. Route the same care whether you mount a camera on a tripod and monopod at the coast or in the mist.
Weather Sealing and Environmental Resistance
That coastal mist erodes quietly. Salt particles settle into every hinge and collar. Material selection decides how long your gear survives this environment. Magnesium alloys corrode faster than machined aluminium. Sealed bearings outlast exposed races. Build quality appears in the detents and the click of each lock. A tripod and monopod that resist the elements share one trait: they use fewer external fasteners.
Weather sealing matters more than the marketing copy suggests. Rubber gaskets keep sand out of twist locks. Anodised surfaces resist winter spray. I check leg joint tolerances before trusting them with a camera. Loose tolerances invite grit. Tight ones keep the elements at bay.
Maintenance Needs for Repeated Field Use
Material selection goes beyond weight and stiffness. A tripod and monopod that survive years of field work rely on parts that resist fatigue. Machined aluminium flanges hold up better than stamped alternatives. Stainless steel shims prevent galling in twist locks. Build quality reveals itself in how securely each segment seats. Loose tolerances create micro play that compounds over time. Tight tolerances reduce wear and keep sand out of internal threads.
Durability maintenance needs are simpler than the marketing suggests! For repeated field use, I schedule a weekly check of all locking mechanisms. I clean debris from every collar with a dry brush. Lubricate only with products specified by the manufacturer. Over greasing attracts grit.
- Inspect feet and rubber grips for embedded stones.
- Wipe down the legs after saltwater exposure.
- Store fully collapsed to relieve spring tension.
These habits extend the life of any support system.
Professional Techniques for Maximizing Stability
Proper Leg Spreading and Ground Contact
The difference between a sharp image and a miss often comes down to a few millimetres of ground contact. Professionals rarely keep their leg lengths equal when the ground tilts. They shorten the uphill leg, lengthen the downhill one, and keep the centre column as low as possible. This matters more than the brand of support. A tripod and monopod each demand different angles. A tripod gains stability from a wide triangle, while a monopod relies on a single grounded foot and your body as the second axis.
– Press the feet firmly into soil or gravel so the spikes bite.
– Remove rubber caps when shooting on sand or loose rock.
– Engage the spreader or stabiliser to lock the leg angles before mounting the camera.
On a windy Cape Town beach, I have watched photographers fight their gear when a small shift in foot placement would have solved the shake. The principles are simple, but they reward patience. A properly grounded tripod and monopod setup turns shaky conditions into solid, repeatable results.
Using a Monopod as a Walking Stick for Low-Angle Shots
Low angle compositions tempt you to fold yourself into unnatural positions. Any tripod and monopod enthusiast knows the ground is the great equalizer, but a monopod doubles as a walking stick when you need to descend to a flower’s eye level. Set the foot against a rock or root, angle the shaft toward your shoulder, and press down. Your body weight becomes the counterbalance, turning the monopod into a third leg. Keep the strap wrapped around your wrist so the pole cannot skid sideways.
For extra stability, shorten the monopod before you lean, because a longer shaft amplifies small movements. Plant the foot first, then bend your knees, and let the pole take a third of your weight. That frees your hands to compose without shaking. A monopod used this way feels less like a stick and more like a quiet partner for the low shot that would otherwise require a tripod and monopod setup folded to knee height.
Applying the Correct Hand and Body Posture
Hand and body posture separates a seasoned photographer from someone merely holding a camera. When you work without a tripod and monopod, your skeleton becomes the support system. The goal is to create a rigid column from the ground to your eye, so your arms act as struts rather than suspension springs.
Tuck your elbows against your torso. This simple action transfers the load from your shoulder muscles to your ribcage. Then, breathe out before you press the shutter. A full exhale reduces chest movement that translates directly into blur. Your stance needs a stable base, with feet planted shoulder width apart. One foot slightly forward adds a natural brace against swaying.
For low shots, kneeling is far more effective than bending from the waist. Drop your knee to the ground and rest the elbow on the raised knee. This creates a stable tripod with your body. The proper footwork for support follows a simple order:
1. Position your feet in a staggered stance.
2. Shift your weight forward onto the front foot.
3. Let the rear foot act as a counterbalance.
This stance turns your entire frame into a human tripod and monopod hybrid, cutting down on micro movements without any extra gear. The discipline of posture, even when using a tripod and monopod setup, remains your primary defense against camera shake.
Combining Support with Remote Shutter Releases
Professional techniques for maximising stability go beyond simply locking the legs. When you pair a tripod and monopod with a remote shutter release, you remove the human element at the exact moment of capture. Pressing the physical shutter button on the camera body sends tremors through the entire support spine. A wireless remote, even a basic infrared unit, isolates the camera from your nervous system.
For the most demanding work, use the camera’s self timer as a redundant safeguard. Set it to two seconds after the remote fires. This allows the support system to absorb any residual oscillation from the mirror or shutter mechanism. In field conditions, a remote release also lets you keep your body low and sheltered, without pressing your face or hands against the equipment.
Weight Hanging and Wind Mitigation Strategies
In gusty conditions, even a solid tripod and monopod combination feels the wind’s pressure. Hanging a weight from the center column hook lowers the system’s center of gravity. This shifts the resonant frequency away from the typical pulse. A camera bag or dedicated sandbag works well. You can also spread the legs wider, but keep them short.
When the wind picks up, consider these tactics:
- Position the support behind a rock or wall.
- Shorten the center column to reduce leverage.
- Use a bungee cord to fasten the weight.
Wait for the natural lull between gusts. Release the shutter then.
Storage and Transportation Best Practices
Professional photographers know that a tripod and monopod are only as reliable as their upkeep. In the field, I maximize stability by pushing the tripod’s legs into the ground with my body weight, but only after ensuring each leg lock is firmly engaged. This simple act prevents micro-shift during long exposures, and what a difference it makes! For storage and transportation, the ritual matters just as much:
- Detaching the head avoids bending the center column.
- A padded bag with a shoulder strap protects the joints.
- Storing in a dry place keeps the locks responsive.
A monopod, when packed, should have its rubber foot removed. Clean the threads and collar regularly. These habits keep both tools ready for the next assignment.

0 Comments